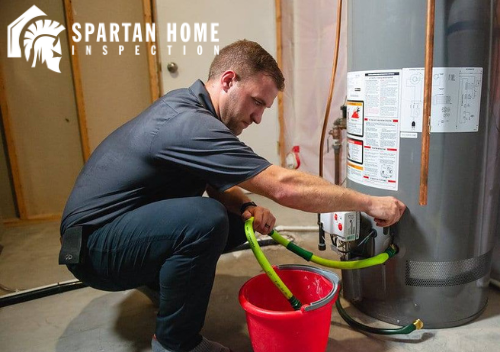
Why is draining your water heater important?
Why is draining your water heater important?
A water heater needs to be properly drained as part of its regular maintenance. Over time, sediment builds up in the bottom of a water heater, which can lead to clogs. Draining a water heater helps flush out this sediment, usually made up of minerals and other debris, that may cause it to malfunction. If you do not properly maintain your water heater, it may not work efficiently or could simply stop working at all.
How do you drain a water heater?
The following steps explain how to drain a water heater. (For specific information on your water heater, be sure to read the owner’s manual.) If you’re uncomfortable performing this type of maintenance on your water heater, call a plumber and schedule a professional draining.
Step 1: Shut off the water supply to your water heater.
At the top of the water heater, you’ll see a water pipe and a shutoff valve going into the water heater. Turn this valve to shut off the water to the tank.
Step 2: Turn off the power to the water heater.
It’s important to shut off the power to your water heater before draining it, or you could potentially burn out the heating elements. If you have an electric water heater, shut the power off from your home’s electrical panel. The correct fuse or circuit breaker should be labeled as being connected to the water heater.
If it’s a gas water heater, you can turn the water heater’s thermostat to “pilot” for this step. Or, shut off the gas supply to the heater. Check your owner’s manual and follow the instructions provided for your specific water heater.
Step 3: Give the water time to cool off.
The water in your water heater is extremely hot. To help prevent injury, it’s a good idea to let your water heater sit overnight so the water within the tank cools down before you drain it. You should wait a few hours at the very least. Taking a hot shower can also help speed up the cooling process.)
Step 4: Attach a hose to the drain valve.
Once your water heater has cooled down, place one end of a hose (you can use a garden hose) into a floor drain or, if it will reach, directly outside. Attach the other end onto the drain valve at the bottom of the water heater.
Step 5: Turn on a hot water tap.
Open the hot water tap, like a sink faucet, that is nearest to the water heater. This helps to alleviate pressure and allows the tank to drain quicker. If possible, the DIY Network recommends using a tap that is on the floor above the water heater.
Step 6: Open the drain valve.
Once you open this valve, the water will begin to flow out of the tank. Be patient, as it may take a while to drain if the tank was full or there is a lot of sediment.
Step 7: Turn the water supply back on to flush the tank with fresh, clean water.
With the drain valve still open, turn the cold water back on to help eliminate any remaining sediment on the bottom of the tank. Repeat this step until the water runs clear. Then, turn the water valve off again.
Step 8: Refill the tank.
Remove the hose from the drain valve, and be sure to close the valve. Turn the water supply back on to start refilling the tank. Once the tank is full, turn the power or gas supply to the water heater back on. Remember to turn off the faucet you turned on earlier while draining the tank.
How often should you drain your water heater?
It’s generally a good idea to drain your water heater at least once a year. If you live in an area with hard water, you may need to drain it more frequently. Remember, always check your owner’s manual to see what the manufacturer recommends.
Water heaters are typically a fairly low maintenance appliance, but remember to drain yours regularly. This may help keep it running efficiently and the hot water flowing.


Leave a Reply
Want to join the discussion?Feel free to contribute!